OEE, Uptime and Performance
One of the fundamental KPIs within a factory is Uptime and OEE.
OEE
Overall Equipment Effectiveness (OEE) measures how efficiently a manufacturing operation uses its resources (facilities, time, and materials) compared to its full potential during scheduled production times. It shows the percentage of manufacturing time that is truly productive. An OEE score of 100% means that only good parts are produced (100% quality), at the maximum speed (100% performance), and without any interruptions (100% availability).
OEE is mostly used as a Key Performance Indicator (KPI). OEE can be compared with previous periods to measure improvement projects, or can be used to check if production is running above the set base line. An OEE of 100% is almost never the goal since in most cases it can never be reached.
An OEE of more than 100% is impossible. In that case the scheduled time or designed speed is set too low.
On this page we will focus on availability and performance.
Availability - Uptime
The Availability portion of the OEE Metric represents the percentage of scheduled time that the operation is available to operate. The Availability Metric is a pure measurement of Uptime that is designed to exclude the effects of Quality and Performance. The losses due to wasted availability are called availability losses.
Example:
A given Work Center is scheduled to run for an 8-hour (480-minute) shift with a 30-minute scheduled break and during the break the lines stop, and unscheduled downtime is 60 minutes.
- The scheduled time = 480 minutes - 30 minutes = 450 minutes.
- Operating Time = 480 Minutes – 30 Minutes Schedule Loss – 60 Minutes Unscheduled Downtime = 390 Minutes
- Calculation: Availability = operating time / scheduled time
- Availability = 390 minutes / 450 minutes = 86.6%
Availability is 86.6%.
Performance
The Performance portion of the OEE Metric represents the percentage of performance loss compared to the designed speed of the manufacturing operation.
Example 1: Continuous Work Center.
A given Work Center is scheduled to run for an 8-hour (480-minute) shift with a 30-minute scheduled break.
-
Operating Time = 450 Min Scheduled – 60 Min Unscheduled Downtime = 390 Minutes
-
Design speed of the machine is 500 m/min
-
The Work Center produces 50.000 meter material during the shift
-
50.000 meter / 500 m/min = 100 Minutes
-
Performance (Productivity) = 100 Minutes / 390 Minutes = 25.6%
Performance is 25.6%.
Example 2: Discrete Work Center
A given Work Center is scheduled to run for an 8-hour (480-minute) shift with a 30-minute scheduled break.
-
Operating Time = 450 Min Scheduled – 60 Min Unscheduled Downtime = 390 Minutes
-
The Standard Rate for the part being produced is 40 Units/Hour or 1.5 Minutes/Unit
-
The Work Center produces 242 Total Units during the shift. Note: The basis is Total Units, not Good Units. The Performance metric does not penalize for Quality.
-
Time to Produce Parts = 242 Units * 1.5 Minutes/Unit = 363 Minutes
-
Performance (Productivity) = 363 Minutes / 390 Minutes = 93.1%
Performance is 93.1%.
Creating an OEE Dashboard
Availability
For calculating the Availability, the Uptime of the Work Center needs to be known. A simple boolean (on/off, 1/0) will do. A Work Center does not always have this information available. The Boolean transformation in the connection can be used to create the boolean, for example “the Work Center runs when the speed is greater than 10”.
Once the boolean is available in UpBlue as a tag, for example WorkCenter_On, the availability is one panel away.
Availability as a single number
Create a Stat panel with this pipeline:
- Get Data — tag
WorkCenter_On, aggregation Time-weighted average, bucket One bucket, gap fill Previous.
That’s it. The time-weighted average of a 0/1 signal is exactly the share of time the value was 1: the availability. Set the panel unit to percent (0-1).
The time-weighted average takes the spacing between datapoints into account. If the datapoints are not evenly spaced, for example because deduplication is active, the result is still correct.
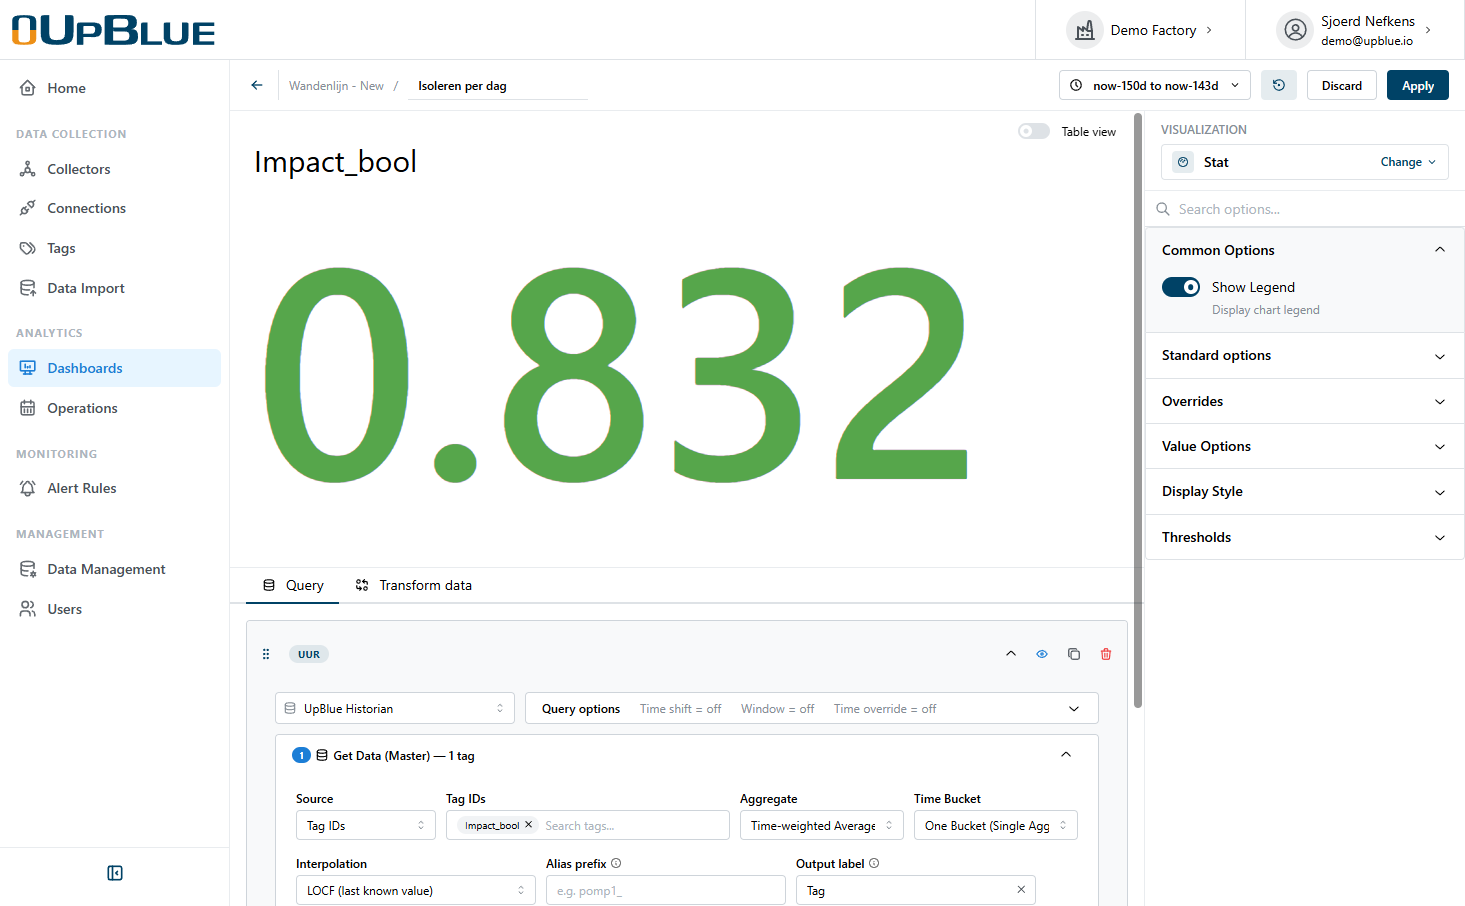
Is the Work Center only scheduled for one 8-hour shift per day, but is your time range whole days? The result is diluted by the 16 unscheduled hours. Add a Math step: $WorkCenter_On * 3 to compensate.
Availability per hour or per day
To see when the Work Center ran, create a Bar panel:
- Get Data — tag
WorkCenter_On, aggregation Time-weighted average, bucket 1 hour, gap fill Previous.
Each bar is now the availability of that hour. For availability per day or per week, set the bucket to 1 day or 1 week.
To show the result in minutes instead of a percentage, add a Math step: $WorkCenter_On * 60.
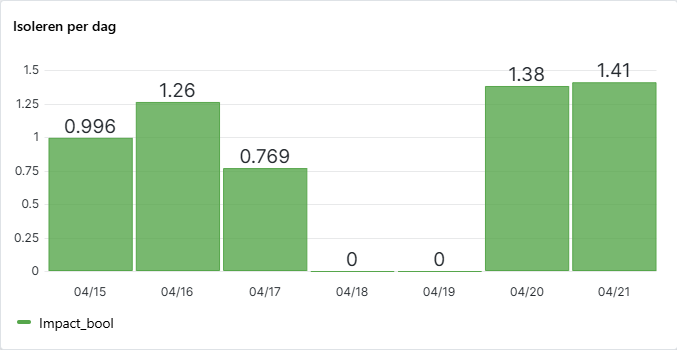
Make sure the deduplication of the WorkCenter_On tag has a Timeout set, for example 300 seconds. The heartbeat datapoints keep the calculation correct during long unchanged periods, and the gap filling does the rest.
Alternative: the Timer transformation
The Timer transformation with “Only maximum value” enabled stores the total running time of each run, at the moment the Work Center stops. Taking the Sum of this tag per bucket also gives the uptime.
Only use this method if the Work Center has short runs. If a Work Center runs for example 2 hours, the whole run is booked on the hour it stopped: the chart will show 0% availability the first hour and 200% the second hour.
Performance
Performance can be calculated in two ways, depending on whether the Work Center is Discrete or Continuous.
Discrete Work Center
A Discrete Work Center produces items. To calculate the Performance, a counter is needed. If the Work Center does not supply a counter, create one with the Counter transformation from a pulse or product sensor.
Do not try to count pulses in the dashboard. Use a Counter transformation to count pulses at the source. The transformation sees every pulse; a dashboard only sees stored datapoints.
Create a Bar panel with this pipeline:
- Get Data — tag
WorkCenter_Counter, aggregation Increase, bucket 1 hour.
Each bar is the number of units produced in that hour. The Increase aggregation handles counter resets correctly.
To turn this into Performance, add a Math step that divides by the maximum of the Work Center. For example at 40 units/hour: $WorkCenter_Counter / 40.
Continuous Work Center
A continuous Work Center has a “speed”, for example m/min for a printing press. The Performance is the average speed while running, compared to the design speed.
Create a Stat panel with this pipeline:
- Get Data — tag
WorkCenter_Speed, aggregation Time-weighted average, bucket One bucket, gap fill Previous. - Get Data — tag
WorkCenter_On, aggregation Time-weighted average, bucket One bucket, gap fill Previous. - Math —
$WorkCenter_Speed / $WorkCenter_On.
Dividing by the on-share removes the stopped time from the average: the result is the average speed while running.
For example the design speed is 500 m/min. Extend the Math step to get the Performance:
$WorkCenter_Speed / $WorkCenter_On / 500
Set the panel unit to percent (0-1).
This calculation does not account for the Work Center running while in Setup.
Quality
Quality is the share of produced units that are good: good units / total units.
To calculate it, two counters are needed: the total production and the rejects (or the good units). A reject sensor can be counted with the Counter transformation, just like the production counter.
Create a Stat panel with this pipeline:
- Get Data — tag
WorkCenter_Counter, aggregation Increase, bucket One bucket. - Get Data — tag
WorkCenter_Rejects, aggregation Increase, bucket One bucket. - Math —
($WorkCenter_Counter - $WorkCenter_Rejects) / $WorkCenter_Counter.
If reject counts are not available digitally, register them per production run as metadata on an operation instead.
OEE
OEE = Availability × Performance × Quality. Combine the three calculations above in one pipeline with a final Math step that multiplies them. Start with Availability alone — it is the easiest to measure and usually holds the biggest wins — and add Performance and Quality when the data is there.
Want the availability and performance per production run instead of per time range? Track your runs with Operations and calculate these KPIs per run with aggregate rules.
Why did it stop?
Availability tells you how much time was lost, not why. Let operators give every stop a reason on a tablet with operator screens, and chart the downtime per reason with the aggregate step of the Operations datasource.